Friday, 9 November 2012

UH 5; lesson 3, Maya Camera Image Projections

I have found a very simple way to successfully project matte paintings or images onto geometry is as follows;

Assign a lambert to simple geometry.
Assign new material via the colour option box.
In the Hypershade, assign your file (However, right click on this option and it will give you a list of options. Select 'Create As Projection'
In the attributes of the camera you wish to project from, change the Proj. Type to 'perspective', and change the Link To Camera to your desired camera.
Fit type: Match camera film gate.
Back up to Projection Attributes Controls, assign your image by selecting the option box.
Afterwards, select your camera you have just assigned your image to, and 'look through selected'.
Render your scene. Not only will your render time be small, but you will also find your image projected into your geometry perfectly. You can obviously swap and change certain attributes to suit your desired look.

I've only spent 5 minutes doing these few projections. They are all matte paintings and have each been generated based on the outcome I desired.


(Below) Alpha channels of geometry + Main Wall Image Projected


(Below) Renders of projections. NONE OF THESE TEXTURES HAVE BEEN BUMP-MAPPED/UV-MAPPED OR ANY OTHER MODIFICATION WITHIN MAYA. Notice how after each projection is completed, each one can still be seen perfectly through your render camera!


(Below) Wall Objects. When your camera projects, if you have assigned the image projection to the correct wall/object then the projection with travel through other objects be default.


(Below) Bump maps assigned as textures to geometry and final colour over-projections.


Final Renders Complete With Sky.


Thursday, 8 November 2012

Tea Break

Having recently submitted two assignments in two days to the University Of Hertfordshire, I have recently had an evening off from working. I lay in bed playing Assassin's Creed III (relevant 'research' for my course of course!) And looked at funny YouTube videos of cats. I also came across a joke that I like;
"If I had 5 ice cubes and 11 apples, how many pancakes can fit on the roof?
... Purple, because aliens don't wear hats."

... Just thought you'd like to know. You've gotta include a little bit of silly in a 'serious' blog, right?


UH 5; lesson 2; Maya Camera Projections

For this Matte Painting project, I must use a piece of geometry and project an image from Maya cameras onto the geometry. I must use Matte Painting techniques to create adequately high-quality images ready for projecting. The Render Camera must move through the 3D scene.

(Below) Research images


(Below) Maya Geometry and Maya playblast rendered through NUKE. ColourCorrect nodes have been applied and the shadows saturation and contrast have been altered slightly, just because I felt like it really.


(Below) Texture images before modification for projection.


UH 7; lesson7; Nuke Compositing/Rat Completion


Monday, 5 November 2012

UH 7; lesson 6; Sub Surface Scattering Virtual Walkthrough

This might seem like a lot of words for one page, but it is all about the Maya Fast Simple Subsurface Scattering using mental ray. Its relatively simple and could be used on any object in Maya,  not just skin textures. I've tried to lay it out in a way that's understandable.

So.

This shader uses mental ray, so go to the render globals and change from maya software to mental ray.
Then set the render quality preset to “preview”
With your object selected, press F6 to change to the rendering menu set and go to “Lighting/Shading->assign new material->Misss_fast_simple_maya” (it is near the bottom)
This shader is a simulated sub-surface scattering shader, and it is optimized so that it renders fast and
doesn’t flicker (and is thus safe to use in animations). While it is not physically accurate, the results are
pleasing to the eye and very fast to render.
If you are in smooth shaded mode, then your object just turned red.  Render and see what happens.
You will see a tan Lambert shader with a specular highlight.  There is no Sub-surface scattering yet.
Back to your viewport:
Select your object, and press control+A for the attribute editor.  At the top of that box, look on the right
side and find “misss_fast_simple_maya1”
Click on that tab to bring up the attributes for the shader.
Open the “lightmap” section, and click on the apply-texture further options button.
Maya automatically creates and connects a lightmap_write node to your shader.  You should be looking at the settings for this.
*note* the name of this node should be “mentalrayTexture1” - If it is not, write down or remember the
name (case sensitive).  you will need it later to make a connection.
Check the “writable” box if it is not done so already.
The width and height should be the same height as your render, and double the width.  So for a 720x480
render, the lightmap should be 1440x480.  Now change the file size depth to “32 bits”
You don’t need to specify an image name.  But if you do, you can render the scene once, and uncheck
the “writable” button.  Then maya will not have to generate the lightmap each time you render the scene.
This saves a considerable amount of time, as the lightmap is the most time consuming part of this
shader.
Now render again.  It should still look exactly the same.
We created a lightmap, but it isn’t connected to the shader group.  Select your object, and open the
attribute editor.  Now click on the “show output connections” button in the upper-right of the window.

You should be taken to the shader group (misss_fast_simple_maya1SG1) for the shader.  Here you can specify all sorts of wonderful things for your shader.
We need a lightmap.
Open the “mentalray” tab, and scroll down to “custom shaders”  then find “Light Map Shader” and click on the texture apply button.
In the Hypershade window that comes up, scroll down to the “lightmaps” section where you should see 4 different icons.  Click on the one called “Misss_fast_lmap_maya”
In the window that pops up this time open the “Lightmap” box section and in the text field type “mentalrayTexture1”
This links the lightmap node to the lightmap_write node you created earlier.  If the name of that node was not
“mentalrayTexture1” then type in whatever the name was.
You can get the name by selecting your object, opening the attributes editor, clicking on the “misss_fast_simple_maya1” tab, and then clicking on the “show input connections” icon, which is above the show output connections button you clicked on earler:
Now render your scene, and you’ll see that you should have a nice tan object with very basic sub-surface scattering happening on the surface.
Here I have turned up the samples, and set the mentalray render settings to “production” quality.

This is the base layer, and works very much like a lambert shader does.
Diffuse weight is simply a multiplier for the diffuse color.
Pretty straightforward – front and back is relative to light position. So if you set the front color to orange, and the back color to red, you’ll have something like skin, and when you see light shine through the object it will be red.
 - Color is the same as any other shader, this time it describes scattered light rather than diffuse or specular
 - Weight is a multiplier for the intensity of the scattered light.
 - Radius is the distance (in scene units) the light can scatteralong the surface geometry.  Not to be confused with Depth
 - Depth refers to the distance that light can travel through
the object.
Specular color is the same as it is in any other shader.  This is the very last layer to be added.
More shininess means a more concentrated highlight.
You can apply a bump shader, but if you do so, make sure you set up a bump network in the hypershade first.  Mental ray shaders cannot automatically do that for you.  You have to create a “bump2d” or“bump3d” node and link it to your bump material.

 Increasing the samples is basically like increasing the quality of the scattering.  More samples means smoother render.
Scale conversion is a means of compensating for scale issues within maya.  SSS is very scale dependent, so very large objects might not appear to scatter at all, unless you play with this value
Light linking mode: 0 – use all lights : 1 – use all lights in the “lights” array below : 2 – exclude all lights in the array.
Filter will soften the effect of the scattering a bit, but it also causes the shader to consume more memory.  Use this if it is needed.
(Width = 2x render width)
(Height = render height)
Filter size depth is another quality control.  Lower depth means less quality, and faster rendering.  Higher makes things look all smooth and nice.
Check the “local” box if you are using multiple computers to render the scene.  The render farm will need this if you have one.
Image name is optional.  But if you specify one, render your scene, and then uncheck the “writable” box, maya will use the already existing lightmap and save valuable render time.
To get to this section, open the attributes for the shader, and click on the “output” button.  Under “mentalray->custom shaders->Light Map Shader” click on the input button.
Ambient color here is a powerful attribute.  It has very strong effect on the render.
Diffuse Gamma Curve controls the bias between scattering perpendicular to a light source, and scattering parallel to a light source.
It’s strange, mess with it and see what happens.
Scatter bias controls the bias between front and back scattering.  -1 is all back, +1 is all front.  0 is the middle.

Hopefully this will produce some good quality renders for realistic skin shaders.

UH7; Lesson 6; Sub Surface Scattering

To create a realistic skin tone/texture on human skin/more human-toned skin on animals, Sub Surface Scattering (SSS) can be applied.

Algorithm Controls.
-Scale Conversions. I'm going to be creating a few renders by only using the Sub Surface Scattering Layer and the Algorithm Controls panel. For a large, marble statue then the scale conversion would be higher. For a smaller object, such as a waxwork, the scale conversion will be less. For example, I took a snapshot of one of my renders for my rat, and you can see that it looks less solid when the scale conversion is lower.


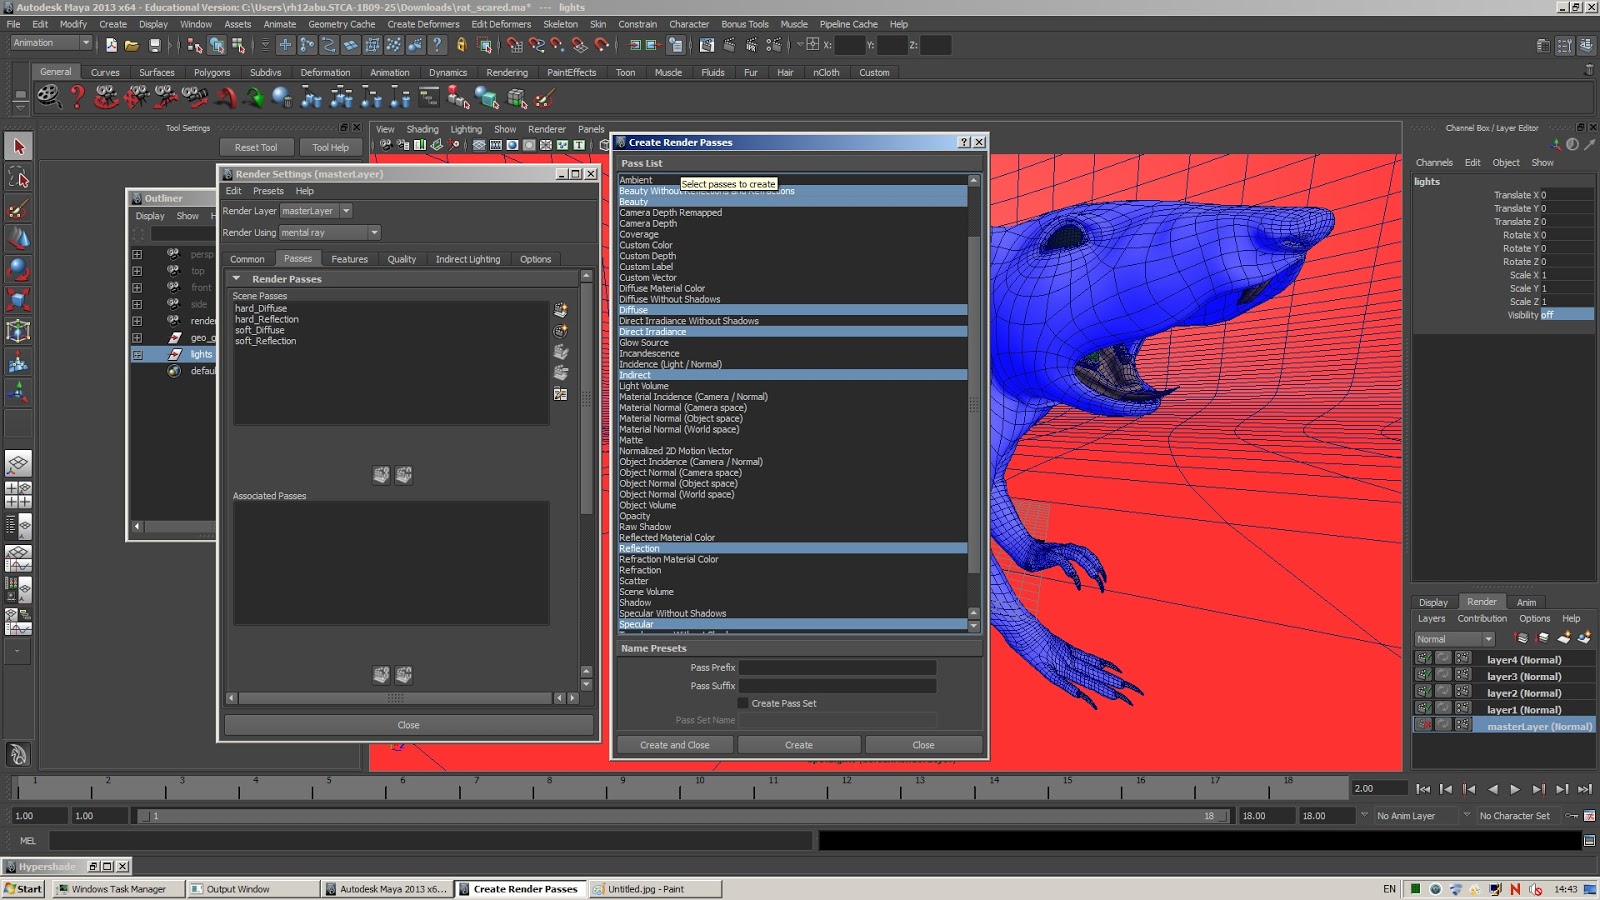
(Below) Render after assigning my texture maps to my Misss_Fast Shader


But for skin, this effect is secondary and of marginal importance since it only shows up in thin
areas such as ears. What is of greater importance is the diffusion of light within the shallow
top layer of the skin.
While the human optical subsystem is specially tuned to view other humans, the very
important effects of subsurface scattering are, paradoxically, very difficult to actually see.
Generally, these effects - unless you know what to look for - are of the variety that you do
not “see” until they are absent, when it becomes obvious that “something is missing”. For
this reason it is also very easy to overdo the effect, and to put too strong sss effects in one’s
renderings.


The fast sss shader scatters light within a certain radius. While we could change all the various
scatter radius in the different layers to see the effects, there is an easier way to quickly assess
the effects, which is, of course, the Scale Conversion control under the Algorithm Controls I mentioned earlier.

Play around with it to your hearts content...
Let it take you somewhere special...
And then get onto Maya, you dirty person, there's work to be done.

Friday, 2 November 2012

UH 3; Lesson 4; Texture Mapping In Maya


The following steps show how to add a texture to an object in Maya:
1. Move the mouse over the main window and press 6.  This will show textures and
everything, if any, on the main window.
2. Next we will create a new shader for the object.  Select the object, hold the mouse
right click, go down to Materials > Assign New Material > Lambert.  This will
change the menu on the right side of the main window to two tabs.  Click on the
lambert2 tab, if not already selected.
3. Next we will tell Maya to read color information from the texture file.  Click on
the checkers colored square next to the Color slide bar.   This will open the
Create Render Node dialog.
4. Select File from the options.  This will close the dialog and will change the menu
on the right of the window.
5. Press the folder button to the right of Image Name or enter the path to the image
you would like to use as the texture.  Pressing the folder button will open an open
file dialog.  Search for the desired texture file name.
6. Once the image file name has been entered, you should see a preview of the
image on the Texture Sample box.
7. Now we will texture map the object.  Select the object and then hold the space
bar.  This will bring up a large selection of menus.  Select Edit Polygons, then
select Texture and click on the square next to Planar Mapping.
8. Select Apply, which will project the texture onto the object, and see if the axis of
the projection and the object line up.  You want the image and the object to line
up along the same axis.  If they don’t line up, then change the axis on Mapping
Direction and try Apply again.  If you are unsure as to whether the projection and
the object are lined up correctly, then continue to the next step and use the UV
Texture Editor to double check.
9. About 98% of the time the texture and the object don’t match up perfectly.  In
order to fix this we can tweak the mapping.  This can be done by moving the
entire texture by pressing the middle yellow square and dragging the texture.  We
can also elongate or shorten the texture by selecting either the blue or red squares.
10. A useful tool is the UV Texture Editor.  Along the left menu bar there are a
variety of window layouts, such as single and four view perspectives.  Click on
the third layout button from the top, the one with the Persp/Outliner tool tip.
The window layout with the two vertical split layout.
11. Click on the left tick and select UV Texture Editor.  Now the window should be
split into two.  The left will show the texture, and the right will be the regular
perspective projection window.
12. The planar mapping manipulator will still be open.  You will be able to
manipulate the texture on both windows.  The following is a excerpt from Chris’
recommendation:
“The big thing is not that it’s a total match, just that the grey parts are over grey,
and that the actual detail stuff (usually landing symbols/names) are reasonable.”
13. Sometimes it is only individual points which don’t line up.  In order to fix this
hold the right mouse button over a vertex in the left window and select UV.  Then
on the left toolbar select the Move tool.  Now you should be able to move individual vertices.  It is always better to select a group over any point since most
of the time there multiple points in each location.
14. Finally select File > Export All … and enter the name for the object you would
like to export.  If you wish to export only a portion of the object, then highlight
the portion that you want to export and select File > Export Selection …, then
enter the file name.

This may seem simple, or obvious, but even the smallest of mistakes/ changes can disrupt the entire process.