Facial Action Control System is the idea behind simple facial rigging without proving an actual rig. It included using blend shapes in Maya and connecting the blendshapes with NURBS controls.
Many duplicates of the rat, with completed blendshapes.
Monday, 26 November 2012
Sunday, 25 November 2012
UH 3; Lesson 7; Jurassic Park Scene
For this particular module, I am required to recreate the lighting of a movie. The scene must be rendered out in MOV format at 1280x720 size and must be no less than 5 seconds, no more than 10 seconds. It must include a character moving through the scene or another character which will be lit appropriately.
(Below) The scene I will be recreating (10 seconds)
My specialist VFX module will be based on the first major scene in Jurassic Park (1993) that features the formidable Tyrannosaurus Rex. Not only is this my favorite movie ever made and therefore has a special little place in my heart, it is also a relatively simple scene in terms of 3D modelling and challenges my lighting skills within Maya. The scene above is what I will be recreating... Unless my mind changes in the next week or so!
(Below) Concept Paintings and 3D models of Tyrannosaurus.
(Below) 3D Model of set, prop and dinosaur. (DeviantArt; All credit to the modeller(s).)
Saturday, 24 November 2012
UH 8; Lesson 4; Organic Rigging
Organic Rigging
Creating an IK-solver based rig will make most rigs look more organic, and will produce a user-friendly user interface of which will be better to animate with. For instance, I have found that using NURBS controls with parent/orient constrains are much more animator friendly when they are connected to the World axis.
(I was creating a back control NURBS system and when I zoomed out I found this. I took a screenshot because I thought it was funny. You think so too, don't kid yourself...)
(Below) The model I will be organically Rigging. With hopefully include FACS (Facial Action Coding System) and facial Rigging.
Creating an IK-solver based rig will make most rigs look more organic, and will produce a user-friendly user interface of which will be better to animate with. For instance, I have found that using NURBS controls with parent/orient constrains are much more animator friendly when they are connected to the World axis.
(I was creating a back control NURBS system and when I zoomed out I found this. I took a screenshot because I thought it was funny. You think so too, don't kid yourself...)
Friday, 23 November 2012
UH 8, Lesson 2; Mechanical Rigging
I will be rigging a mechanical figure before mocing onto organic creatures. This way I can become re-accostomed to IK Handles and Outliner Parenting again. I studied mechanical Rigging in some detail last year when I made a rough render of a Lightbulb Spider. I'll upload that to this post shortly.
Mechanical Rigging
I will be using a robot model to rig firstly. I will take a few snapshot print screens for added benefit> These will show how I am parenting certain things into groups too.
(below) Model I will be mechanically Rigging first.
- Model provided by TurboSquid
Mechanical Rigging
I will be using a robot model to rig firstly. I will take a few snapshot print screens for added benefit> These will show how I am parenting certain things into groups too.
(below) Model I will be mechanically Rigging first.
- Model provided by TurboSquid
Friday, 9 November 2012
UH 5; lesson 3, Maya Camera Image Projections
I have found a very simple way to successfully project matte paintings or images onto geometry is as follows;
Assign a lambert to simple geometry.
Assign new material via the colour option box.
In the Hypershade, assign your file (However, right click on this option and it will give you a list of options. Select 'Create As Projection'
In the attributes of the camera you wish to project from, change the Proj. Type to 'perspective', and change the Link To Camera to your desired camera.
Fit type: Match camera film gate.
Back up to Projection Attributes Controls, assign your image by selecting the option box.
Afterwards, select your camera you have just assigned your image to, and 'look through selected'.
Render your scene. Not only will your render time be small, but you will also find your image projected into your geometry perfectly. You can obviously swap and change certain attributes to suit your desired look.
I've only spent 5 minutes doing these few projections. They are all matte paintings and have each been generated based on the outcome I desired.
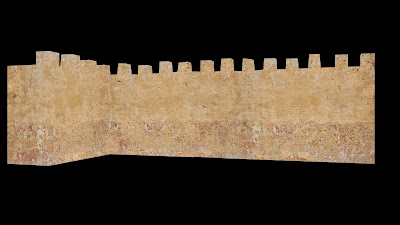
(Below) Alpha channels of geometry + Main Wall Image Projected

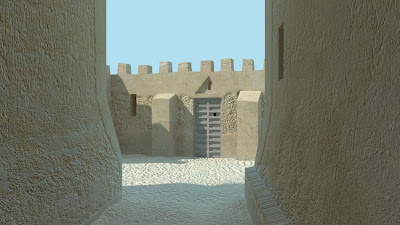
(Below) Renders of projections. NONE OF THESE TEXTURES HAVE BEEN BUMP-MAPPED/UV-MAPPED OR ANY OTHER MODIFICATION WITHIN MAYA. Notice how after each projection is completed, each one can still be seen perfectly through your render camera!
(Below) Wall Objects. When your camera projects, if you have assigned the image projection to the correct wall/object then the projection with travel through other objects be default.
(Below) Bump maps assigned as textures to geometry and final colour over-projections.
Final Renders Complete With Sky.
Assign a lambert to simple geometry.
Assign new material via the colour option box.
In the Hypershade, assign your file (However, right click on this option and it will give you a list of options. Select 'Create As Projection'
In the attributes of the camera you wish to project from, change the Proj. Type to 'perspective', and change the Link To Camera to your desired camera.
Fit type: Match camera film gate.
Back up to Projection Attributes Controls, assign your image by selecting the option box.
Afterwards, select your camera you have just assigned your image to, and 'look through selected'.
Render your scene. Not only will your render time be small, but you will also find your image projected into your geometry perfectly. You can obviously swap and change certain attributes to suit your desired look.
I've only spent 5 minutes doing these few projections. They are all matte paintings and have each been generated based on the outcome I desired.
(Below) Alpha channels of geometry + Main Wall Image Projected

(Below) Wall Objects. When your camera projects, if you have assigned the image projection to the correct wall/object then the projection with travel through other objects be default.
(Below) Bump maps assigned as textures to geometry and final colour over-projections.
Final Renders Complete With Sky.
Thursday, 8 November 2012
Tea Break
Having recently submitted two assignments in two days to the University Of Hertfordshire, I have recently had an evening off from working. I lay in bed playing Assassin's Creed III (relevant 'research' for my course of course!) And looked at funny YouTube videos of cats. I also came across a joke that I like;
"If I had 5 ice cubes and 11 apples, how many pancakes can fit on the roof?
... Purple, because aliens don't wear hats."
... Just thought you'd like to know. You've gotta include a little bit of silly in a 'serious' blog, right?
"If I had 5 ice cubes and 11 apples, how many pancakes can fit on the roof?
... Purple, because aliens don't wear hats."
... Just thought you'd like to know. You've gotta include a little bit of silly in a 'serious' blog, right?
UH 5; lesson 2; Maya Camera Projections
For this Matte Painting project, I must use a piece of geometry and project an image from Maya cameras onto the geometry. I must use Matte Painting techniques to create adequately high-quality images ready for projecting. The Render Camera must move through the 3D scene.
(Below) Maya Geometry and Maya playblast rendered through NUKE. ColourCorrect nodes have been applied and the shadows saturation and contrast have been altered slightly, just because I felt like it really.
(Below) Texture images before modification for projection.
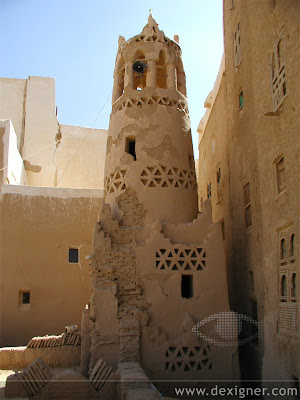
(Below) Research images
(Below) Maya Geometry and Maya playblast rendered through NUKE. ColourCorrect nodes have been applied and the shadows saturation and contrast have been altered slightly, just because I felt like it really.
(Below) Texture images before modification for projection.
Subscribe to:
Comments (Atom)


